
Home brew “DX Commander” 7m antenna – November 2021 … Australian date & time
Firstly, this build is a copy of a commercial antenna so ALL credit to the design and effort of the idea all goes to the designer:
Callum McCormick, M0MCX https://www.m0mcx.co.uk
The original build information is here https://www.m0mcx.co.uk/wp-content/uploads/DXC-Rapide-User-Guide.pdf
Note there are several YouTube videos that should be viewed as well as reading through the build document above. (YouTube videos are referenced in the document written by Callum above). Do this prior to construction as this is the underlying information you need to know for the build.
This document describes my particular build process, tuning outcomes and what I found building my copy. I also list the Australian parts suppliers I used. The antenna is a copy of Callum’s DX Commander 7m Rapide design which he sells from his website listed above. I decided to cut elements for the following bands (as Callum also documents in his build guide in the 40m Adjustment section on page 4.):
- 10m
- 12m
- 15m
- 17m
- 20m
- 40m
To note there are different cut lengths if you are building the standard antenna vs the 40m adjustment so make sure you use the correct one for what you want to build. (I added another 5cm to each of Callum’s cut lengths just to be safe.)
Parts:
| Part | Link | Quantity |
| 7M Haverfords squid pole | https://haverford.com.au/collections/telescopic-squid-poles/products/7m-telescopic-poles-multi-purpose | 1 |
| Element Guide plates (3)-Made from Chopping boards | https://www.rejectshop.com.au/p/plastic-chopping-board-37x23cm | 2 |
| Wire Each of these can be bought by the role (100m)–24 x 0.2mm heavy duty hookup wire (Jaycar). | WH3041 (Black): https://www.jaycar.com.au/black-heavy-duty-hook-up-wire-sold-per-metre/p/WH3041WH3040 (Red): https://www.jaycar.com.au/black-heavy-duty-hook-up-wire-sold-per-metre/p/WH3040WH3042 (Green): https://www.jaycar.com.au/black-heavy-duty-hook-up-wire-sold-per-metre/p/WH3042 | 105m total (Maybe 110m for wastage and over cutting) |
| 4mm Shock cord -tensioning elements | https://www.bunnings.com.au/grunt-4mm-x-5m-black-shock-cord_p4310533 | 1 |
| 4mm Paracord-you will only need around 8m total for the guy ropes | https://www.bunnings.com.au/grunt-4mm-x-30m-para-cord_p4310740 | 1 -The quality of this rope is pretty poor. Better quality “Paracord” can be found on ebay but is a bit more expensive |
| 3mm Paracord-For use to tension elements (use with the shock cord)This is lighter weight than 4mm paracord and also a bit more visible. You will use around 4-5m. | https://www.bunnings.com.au/grunt-3mm-x-15m-para-cord_p4310741 | 1 |
| Plastic shock cord ends(carabiners) | https://www.ebay.com.au/itm/313369938081 | 1 (set of 10) |
| Plastic number beadsfor element identification (optional) | https://www.ebay.com.au/itm/334153760807 | 1 (250 in a pack) |
| Ground and driven element plates(150mm x 3mm disc) | https://www.ebay.com.au/itm/274564411102?var=574781856591or (cheaper but with shipping)https://www.ebay.com.au/itm/112763328879 | 2 |
| Aluminium plate150mm x 50mm x 3mm for extending Angle mounting (next item)-This item is cut in half to make 75mm x 50mm x 3mm plate. | https://www.ebay.com.au/itm/294442541589?var=593034496844 | 1 |
| Aluminium angle-for mounting RF connector (BNC connector) | https://www.bunnings.com.au/metal-mate-30-x-30-x-1-5mm-1m-aluminium-angle_p1130510 | 1 |
| Hose clamps(Sizes to suit Squidpole sections) | https://www.bunnings.com.au/prime-22-38mm-solid-butterfly-screw-band-hose-clamp_p3110907 | 3 |
| Eye terminals | https://www.jaycar.com.au/eye-terminal-crimp-5-3mm-yellow-pk-100/p/PT4715 | 13 minimum (Similar to these.) For ground radials you will need eye terminals big enough to accept 4 wires |
| Zip ties (100mm long) | For holding end loop in elements while tuning. Once tuned use glue impregnated heatshrink to permanently secure. | Depends how many times you need to cut elements |
| Nuts, bolts, washers and wing nuts | All 5mm stainless. BOLTS -Standard hex head (16mm long is a good size)NUTS -Nylock version as these wont come looseWASHERS to suit.WING NUTS | 21211313 |
| BNC Panel connector (9.5mm mounting hole)You could use an SO-239 if you wanted. I happened to have a few BNC’s spare | Wherever you buy your connectors from! | 1 |
Creating the plastic element “spreaders”
!This was a very messy exercise resulting in a LOT of fine plastic residue to clean up. Use a vacuum attachment if you have one!
On a piece of A4 paper draw an 18cm diameter circle.
Use the process here to create a hexagon: https://www.youtube.com/watch?v=shVumum36k4
Cut out the paper hexagon template then use this to draw onto the plastic chopping board with a sharpie marker. Use the opposing points of the hexagon and a ruler to mark the centre of the hexagon for hole drilling.
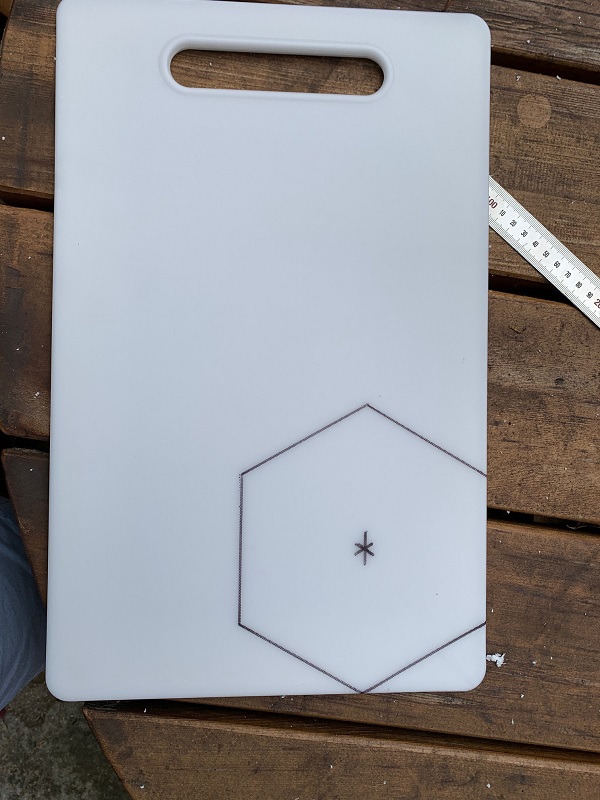
Cut the hexagons out of the chopping board (I used a jigsaw with 18TPI blade) -Make 3 of these.
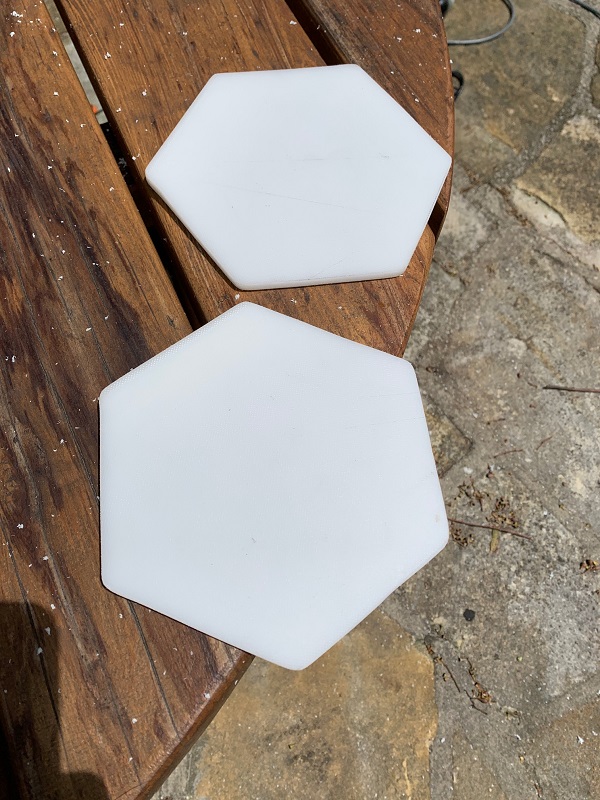
Drill holes for the driven elements near each point (4.5mm and then use a debur tool or a larger drill to slightly countersink each hole on either side to remove sharp edges.)
The centre holes were made according to where they sit on the squid pole. These sizes allow each plate to stop at the bottom of the pole section just resting on the top of the next lower pole. The holes were drilled with a speed bore and these conveniently came in the sizes I used below. Make sure the speed bore is sharp otherwise it will melt the chopping board and be a bit messy to clean up.
For my squid pole the hole sizes were:
- Upper plate (left) 18mm (could be 19.5 – 20mm depending on where you want this plate to sit. Mine sat a little further up the pole section than expected but works fine.)
- Middle plate (middle) 28mm
- Lower plate (right) 35mm (also used to guy. Guy holes (x3) were 8.5mm)
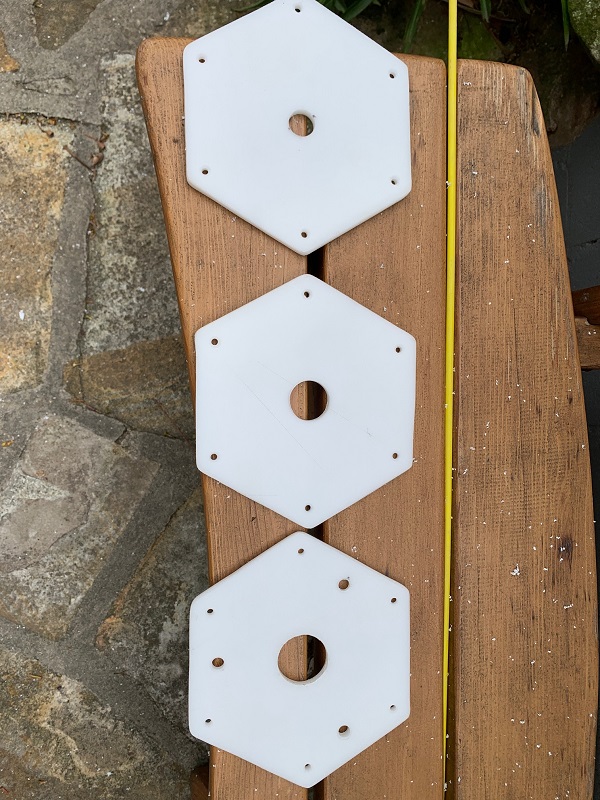
Check the fit of each plate on the squid pole sections. The plates should sit at the bottom of each of the following pole sections:
Lower (& Guy) plate -Sits bottom of section 2 -just above section 1. There is also a hose clamp installed at this section as it is a guy plate and exerts additional downward force and would pull down without the hose clamp.
Middle plate -Sits bottom of section 4 -just above section 3
Upper plate -Sits around 1/3 the way up section 6 (or you can enlarge the hole by a mm or two and it will sit at the base of section 6) – I only had an 18mm speed bore so I settled for where this plate ended up.
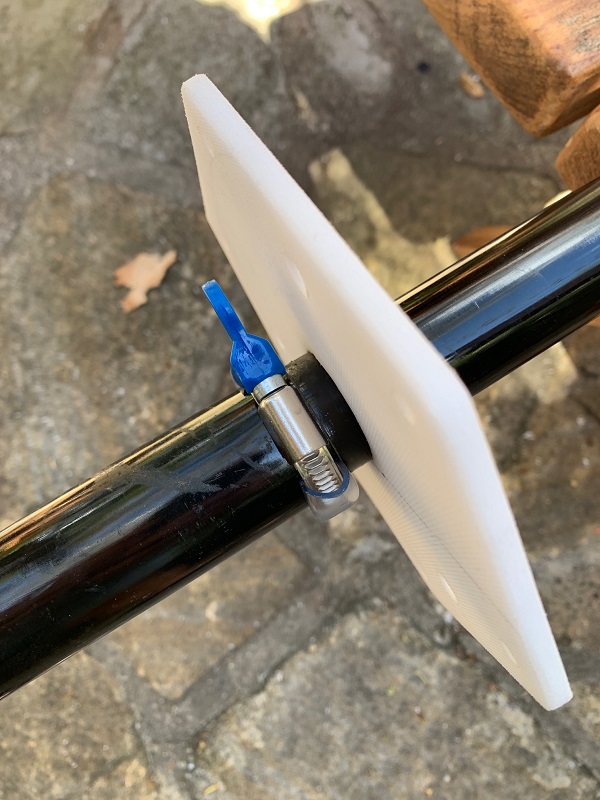
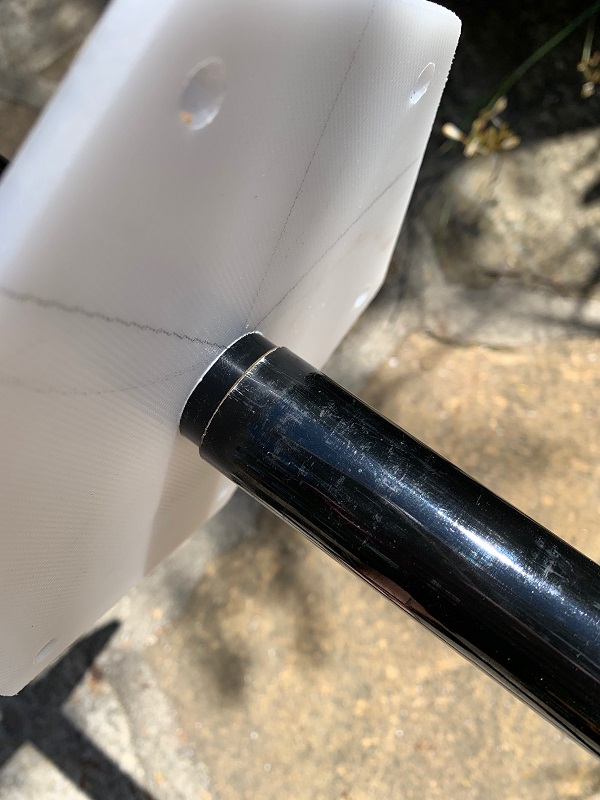
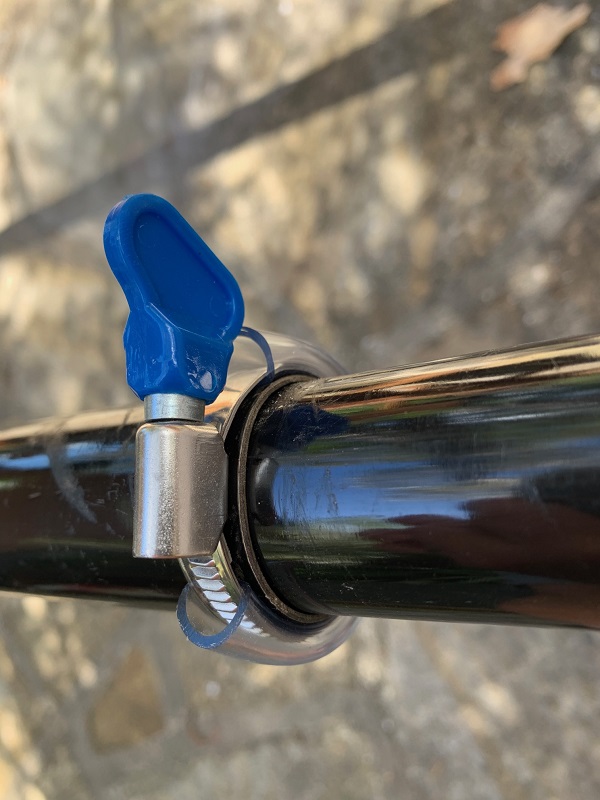
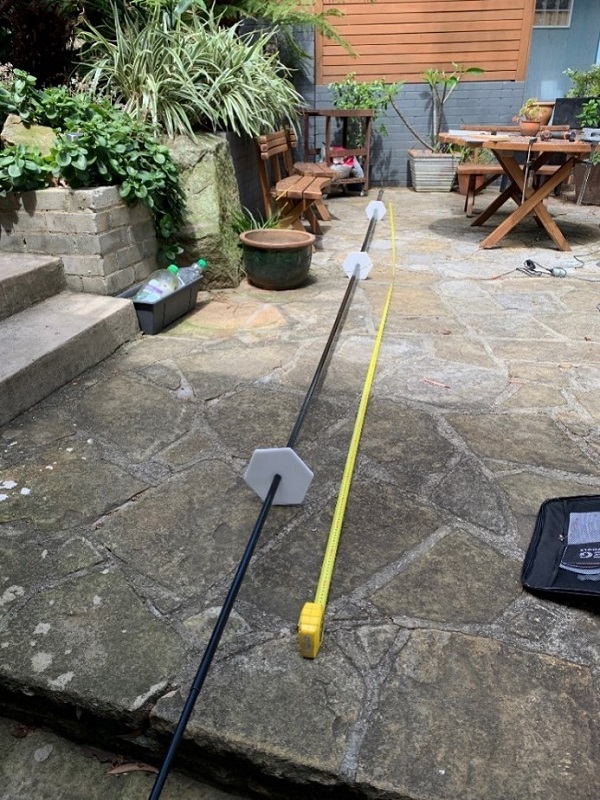
Ground and element plates (Aluminium)
Mark the centre of the 2 aluminium plates and bore a hole that suits the lower diameter of your squidpole.
For mine I went for:
- 38mm for the driven element plate (and then had to file out the remainder carefully to make a snug but not contacting fit around the pole)
- 51mm for the Ground/Radial plate. This is fairly loose around the bottom of my squidpole but this doesn’t matter. It also means the pole can be pulled up from the base and laid flat to adjust elements without disturbing the elements.
I used a hand drill and metal hole saw ($7 for a small set from Bunnings) to cut the hole and this was a bit messy, so if you have a drill press this would be a lot neater (or a lathe would be the best!)
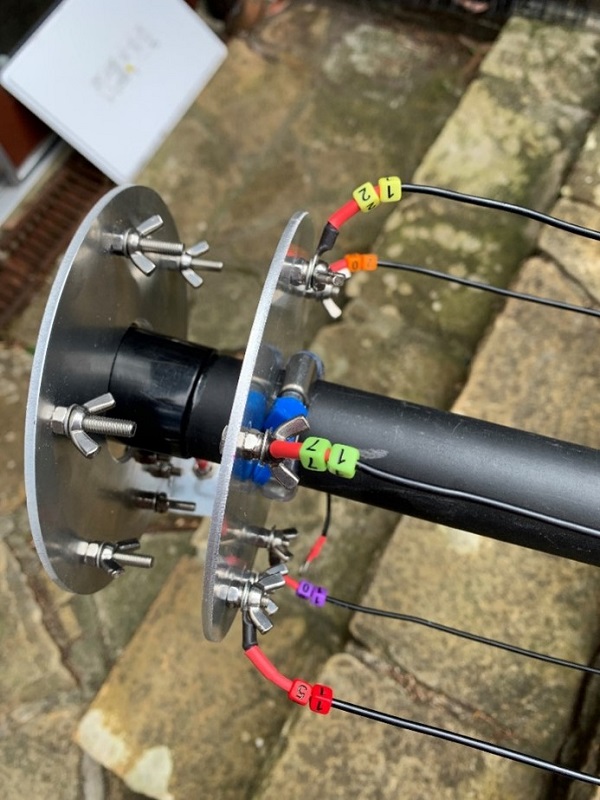

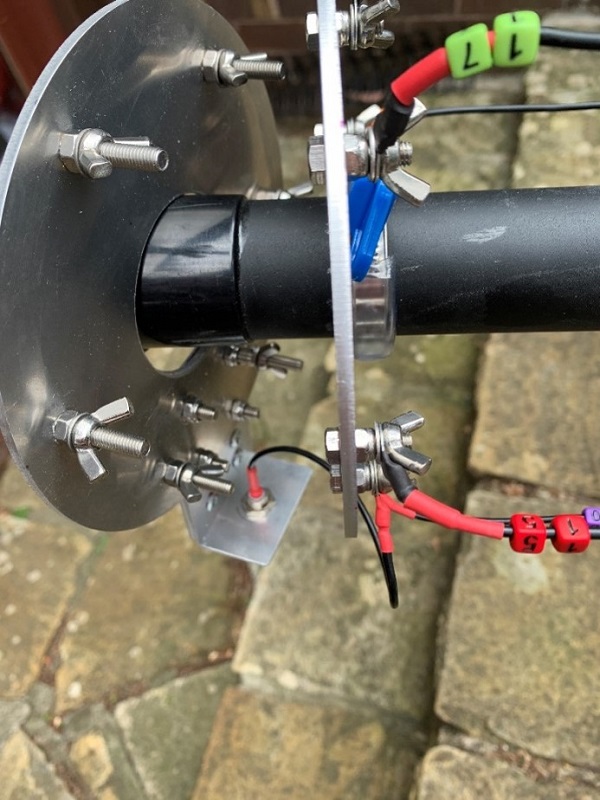
Hose clamp above driven element plate to prevent it from slipping up squidpole when elements are under tension with shock cord fitted. Marked the band connection points on the driven plate with a Dymo labeller and band elements with plastic numbered beads.
The BNC connection is the centre conductor of the BNC socket on the ground plate.
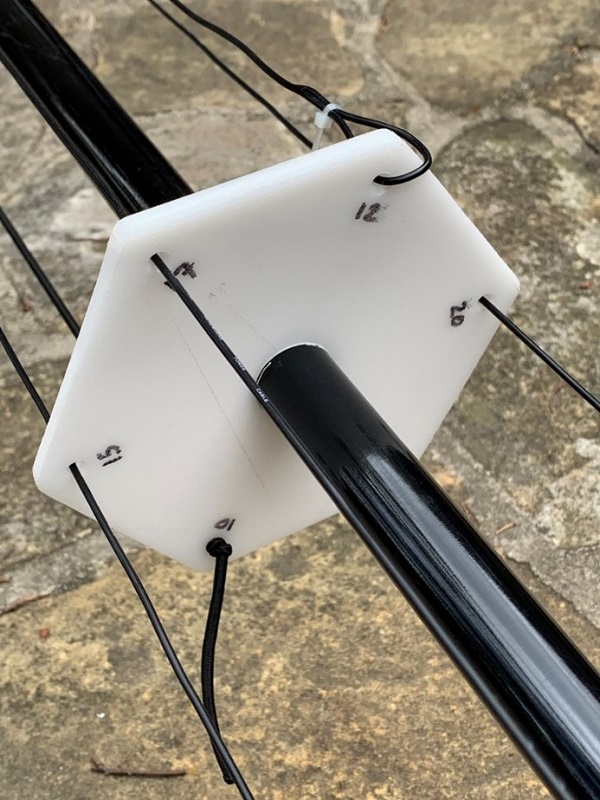
Middle element spreader (Shockcord for 10m element point as element end sits lower than this spreader). A good idea is to mark the bands as shown (40 is hidden) on each of the spreaders as this makes it easier to keep track of where each element should be placed.
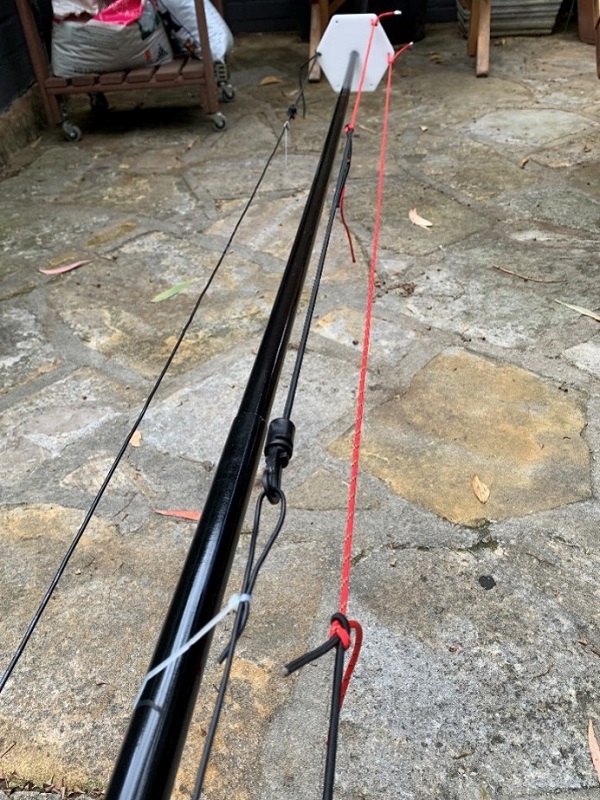
3mm Paracord (red) and 4mm Shock cord to tension elements. Shock cord length approx. 30cm unstretched seems to give enough tension without over stretching wire. Use the 3mm Paracord to make up the distance required to reach the spreader it connects to plus a little spare as you will typically cut the wire elements back to tune you will need a little more 3mm paracord than what you begin with.
The element in the foreground (17m) is temporarily held with a zip tie as had not been tuned at this point.
The element on the left side is 20m. (40m element had not been installed at this point)
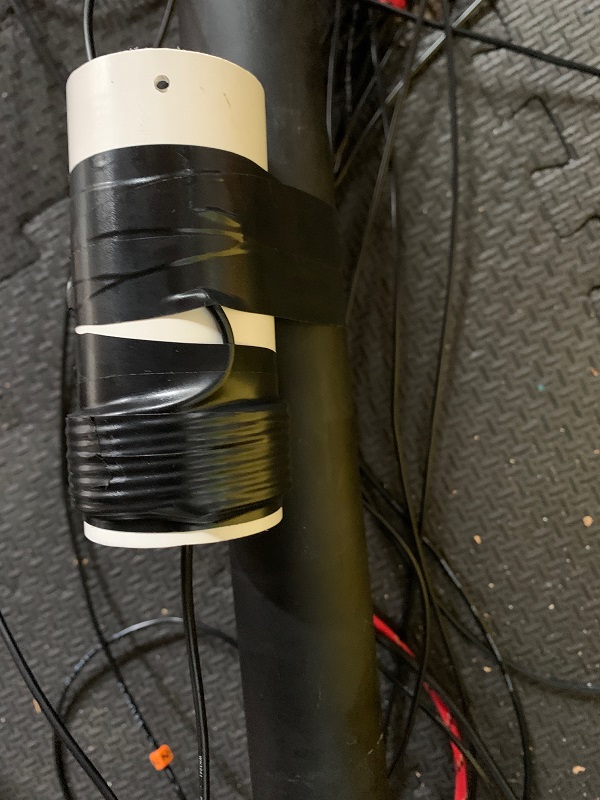
The 40m band setup.
In Callum’s documentation he describes the 40m conversion whereby he suggests creating a 14 turn coil at the lower squidpole section and continuing the remainder of the 40m element up the pole. I decided I didn’t want the coil on the squidpole itself as this makes it impossible to disassemble due to the snug fit of the driven element plate.
I found a piece of 40mm (ID) PVC tube which I used as the coil former and after some experimenting found 7 turns was around what I needed for 40m.
This coil former was then taped to the squidpole where Callum suggested. (Long term install will likely be with zip ties and will prevent water from accumulating around the coil and tape)
Setup for tuning
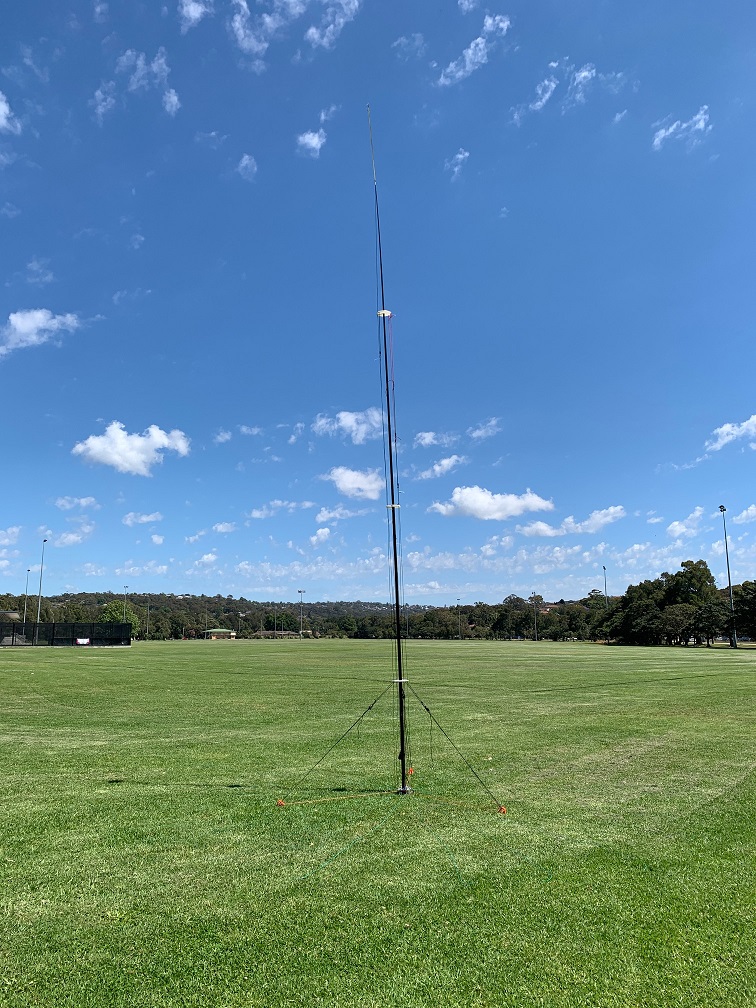

Base of antenna.
Showing:
- A few of the (6x) 4 bundled ground radials (3.2m long) connected to the ground plate at bottom.
- The centre conductor from the BNC socket connected to the driven element plate via a short piece of wire
- Driven element plate with elements connected (marked with numbered beads) and under tension via the shock cord above. You can also see the hose clamp above the driven plate to prevent it sliding upwards.
- The orange rope is installed to stop the base from wandering and is tied off to the ground stakes.
Tuning
Tuning was (is still underway) done using a 24m length of RG58 terminated with BNC plugs (it was lying around) and this was connected to a Rig Expert AA-600.
The initial sweep of bands 40 – 10m showed the ugly SWR plot:
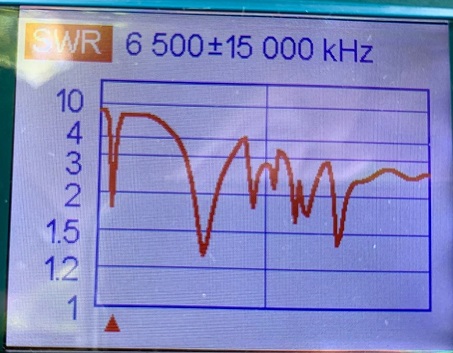
As all elements were cut VERY long this was expected.
Slowly working through each band/element the results below (so far) were achieved. (I will continue to tune these to the desired target frequencies)
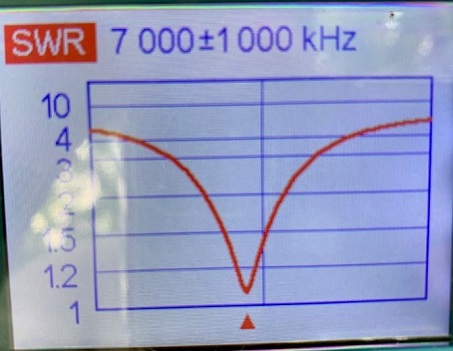
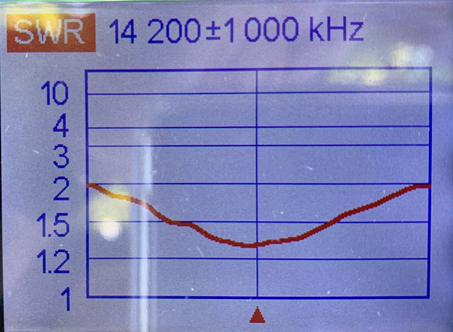
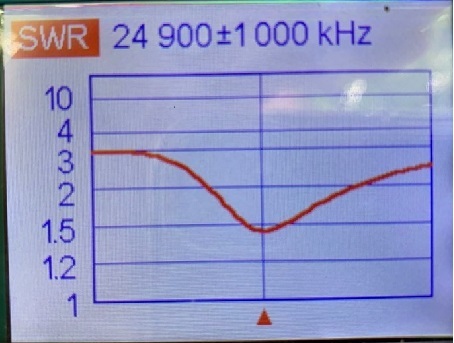
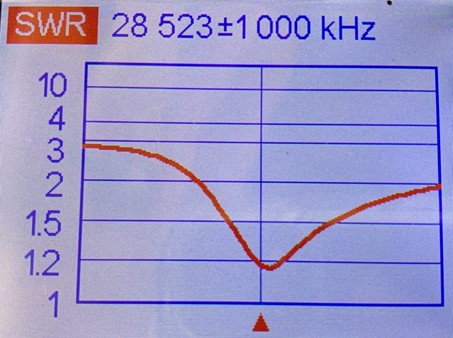
Things of note:
- Using the Rig Expert made tuning VERY easy. If you have access to one or something similar they are excellent.
- Callum references an element tuning calculator in his build document. This is an excel sheet with some simple formulas in it. Its VERY helpful.
- Make sure when tuning you keep all elements nicely tensioned as this minimises SWR anomalies.
- Make sure to tape each squidpole section at the join to the next one as when under tension they will tend to self collapse!
- Tuning is a long process! Take your time and the results will be worth it.
- Under a lot of load the plastic element clips popped the shock cord so 2 knots are required in the ends there.
- My build is not pretty. This was more a first go and I would suggest using a drill press especially on the aluminium plates. I only had hand tools but I had enough to make it work. Buying the aluminium discs saved a LOT of hassle
- The cost of materials is high as there is a lot of unused parts. If you can split the cost to make additional antennas this will make it better (cheaper).
Simon VK2YU – November 2021
Hi, thank you very much for this very interesting article. I want to make the same kind of antenna but using my 40m 1/4 aluminium pole as the main pôle. I will certainly begin with a 7m fish pole for testing…
I don’t have any rigexpert. Do you know where i could find all wires length ?
Thanks again. Best 73 de F8DRA
Hi F8DRA,
Thanks very much for reading my post. It has been a while since this one went up so glad to see it is still getting read!
With regards to using the aluminium pole, the designer of the antenna (Callum McCormick M0MCX) went to great lengths to design the antenna with a non conducting support pole so anything other will probably not work or will be very compromised.
The original cutting lengths were published in the build guide which doesn’t seem to be on the DX Commander website however if you use the WaybackTimeMachine you can find a copy of the PDF here with all the measurements in it: https://web.archive.org/web/20210925180801/https://www.m0mcx.co.uk/wp-content/uploads/DXC-Rapide-User-Guide.pdf If you are looking for the version that includes 40m you’ll find the lengths on pg4 but best to read the entire document to get an understanding of the whole construction method.
I would strongly suggest (if you haven’t got access to a RigExpert) to try to purchase a NanoVNA as they are a fantastic tool for building and tuning antennas. I have a couple which I found online and many others in our club use these as well.
Good luck with your build!
73’s
Simon VK2YU
Hi,
I’ve decided to make a similar antenna and am considering options for the pole. Do you find the telescopic pole is sturdy enough for a permanent installation? I am thinking instead of using a 6m fibreglass tube that is the same diameter all the way up and having 40 cm or so in a sleeve below ground. Hopefully this will make the antenna sturdy enough to be left out permanently. I was thinking for 40m using a linear loaded element that’s goes up the pole, back down to a certain point and then back up. The only question I have is will close to 50 ohm match be achieved. Anyway thanks for this article, it’s definitely inspired me to make my own version too. 73 Owen
Hi Owen,
I can’t say I have had my antenna in a permanent install situation however some thoughts: *The 7M pole I use is one of the Haverford “multi-purpose” poles and is relatively robust. I’m not certain how it would go permanently UV wise though.
*For a permanent install I’d perhaps suggest mechanically locking the pole sections rather than relying on the standard friction method as I feel this is definitely a weak point. Taping each section with electrical tape does work well in the short-term but I doubt electrical tape would survive long term. Perhaps self amalgamating tape would work better with electrical tape over the top as a sacrificial layer.
If you are using a single piece pole as you propose I’m sure this would be much better for a long term install. Securing it in a sleeve would be a great idea as I always considered the ground mounting of the pole to be a weak point in terms of side slipping in high wind. Even just a 10cm hole would be good.
Not sure about the 40m loading but there’s only one way to find out isn’t there?! You could also look at using some sort of rigid tubing like dishwasher inlet hose to extend the antenna wire reach at the top or add a section of fibreglass cavity snake to attach to??
Would be great to see a write up of your antenna once complete.
Thanks for all the Australian links and resources. A newbie here, but is there any advantage to using a 10m instead of the 7m pole?
Comment: Thanks for all the Australian links and resources. A newbie here, but is there any advantage to using a 10m instead of the 7m pole?
Simon’s reply:
Sure! Always good to pass on information to others.
Infact the designer (Callum) did originally use a 10M pole for his (first?) design. The copy I have documented, now on our website, was based on Callum’s 7m “Rapide” version. I only had a 7M pole at home so that’s why I went with the Rapide version. I would say if you have a 10M pole, just check how flexible the top couple (or maybe 3) sections are as some of those taller poles are very bendy at the top and may have trouble supporting any moderate wire weight. You really want the wire elements to remain quite still (especially while tuning), otherwise if they are moving about or in different positions when taking measurements you’ll have a hard time.
You can do more reading on Callum’s website: https://www.m0mcx.co.uk/
And I would strongly suggest watching all the YouTube videos as this is where I found the most information.
Specifically, here is the link to the 10M “Classic” build notes.
https://www.m0mcx.co.uk/dx-commander-user-guides/
On that page there are 4 coloured squares under the first image that document the build of each of his antennas as well as videos further down that page.
Again, there are a few YouTube videos he provides on that same page, and there are some on VK7HH’s YouTube channel (Ham Radio DX) where he builds and tests one out.
Good luck with your build if you decide on one. I had a lot of fun working out how to do my home brew copy and thought others could benefit from my experiences.
I still need to complete the final tuning which I will get to sometime soon (hopefully) 😄 … (and update our website).
Let us know if you have any other questions.
Regards and 73’s
Simon
VK2YU
Excellent article Simon, thanks and well done!